For the complete documentation index, see llms.txt. This page is also available as Markdown.

Users

Invite people to your Seemore workspace, set their role, and decide which accounts and teams they belong to.

Overview

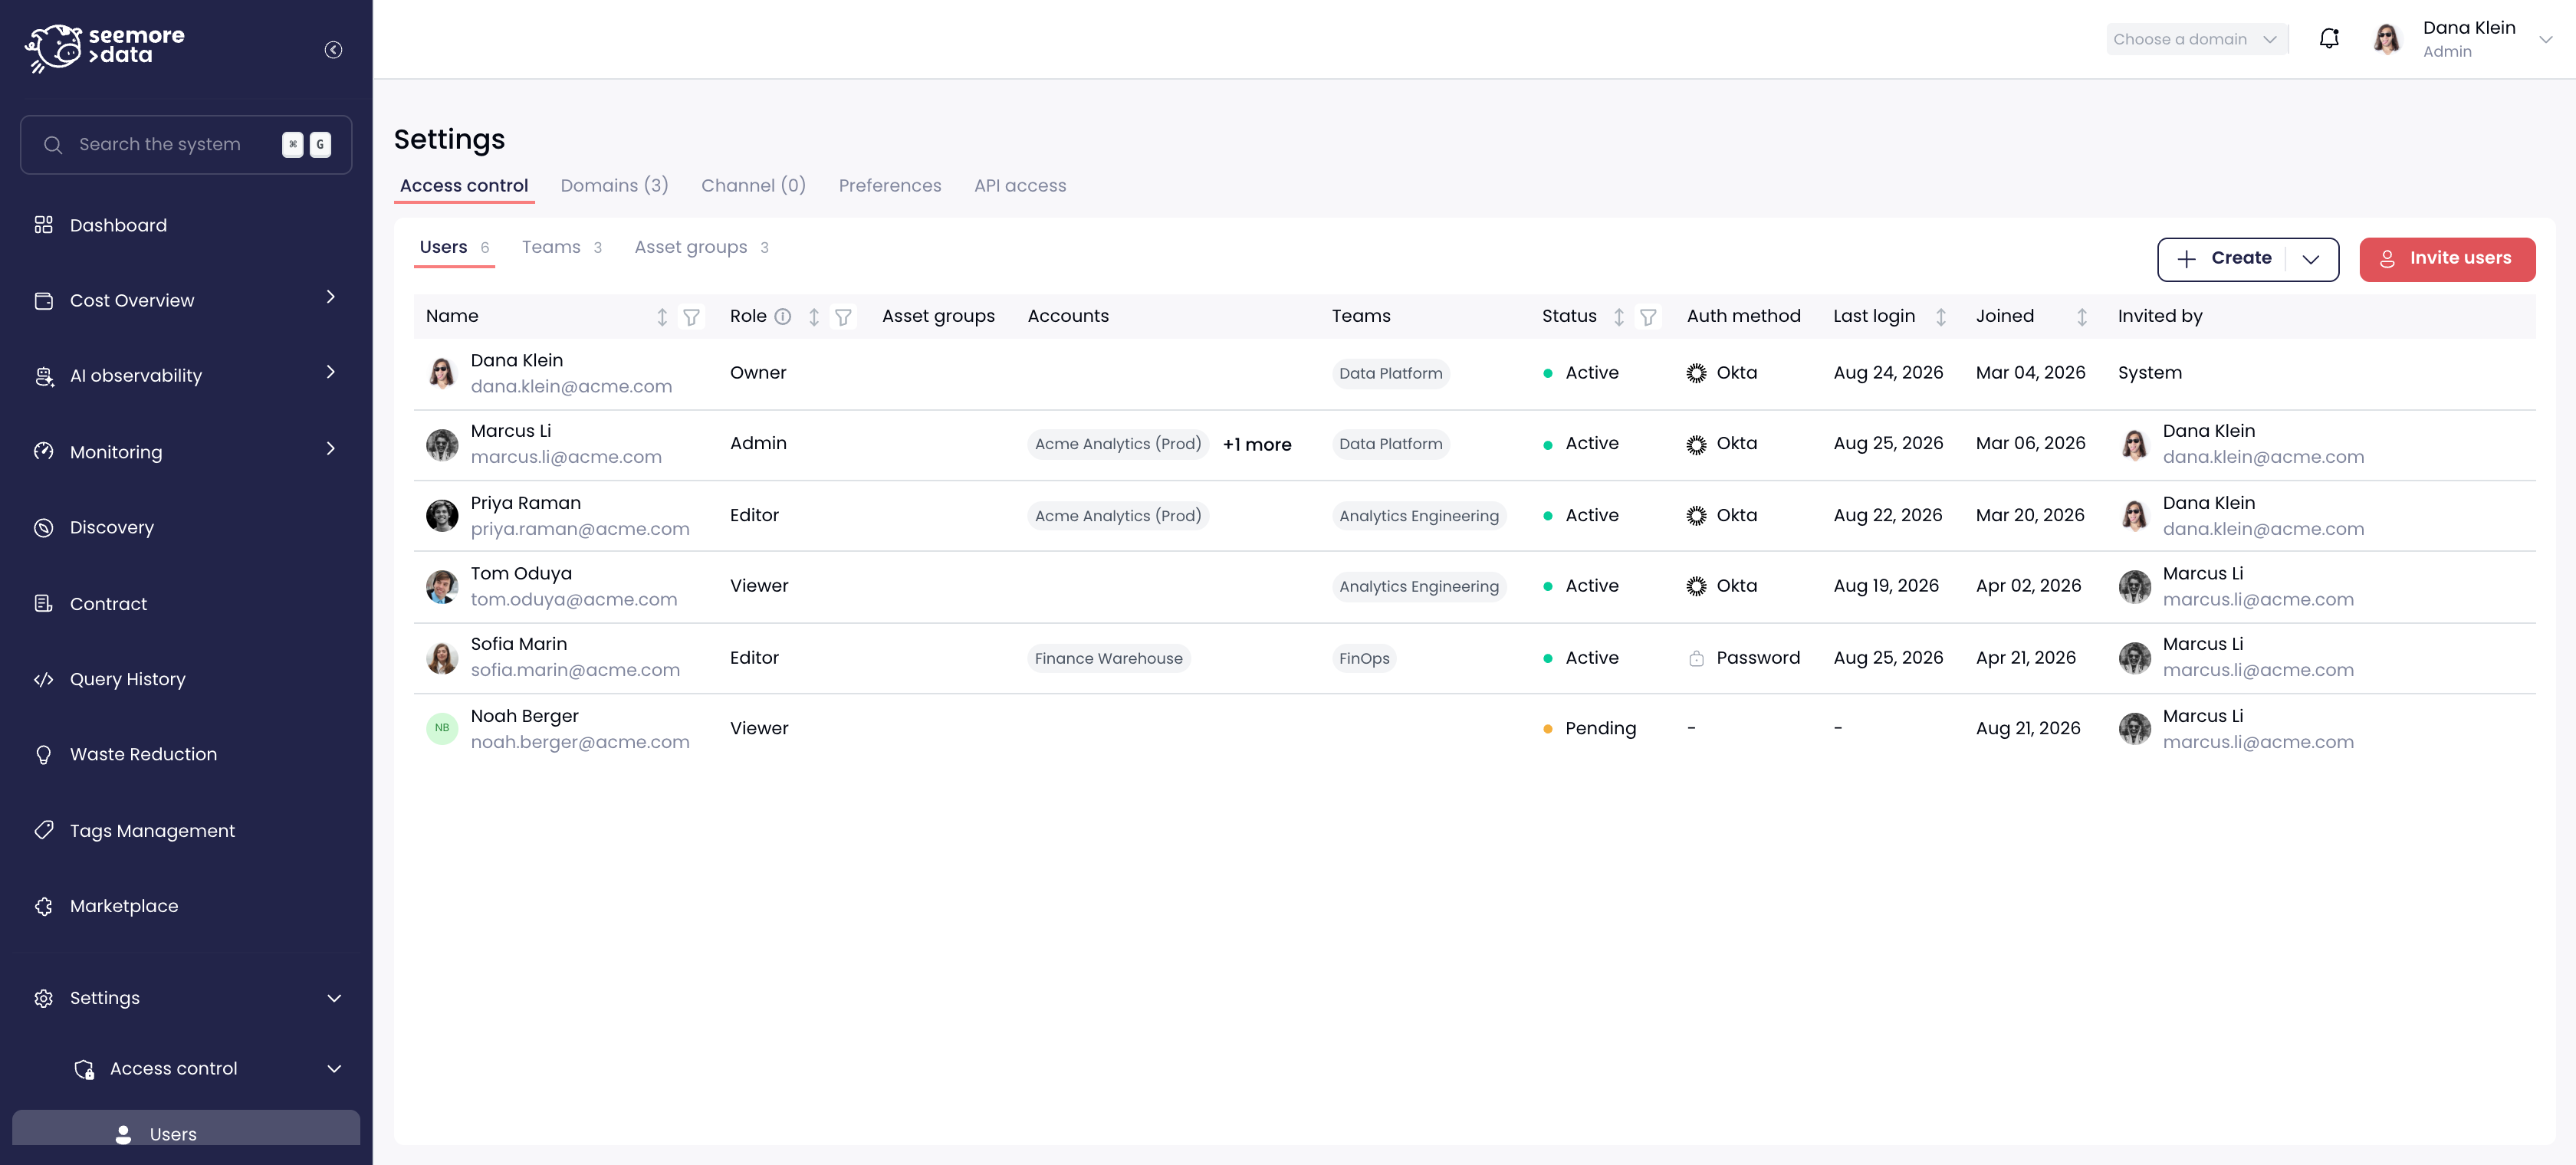
Settings → Access control → Users lists everyone in your workspace, whether they signed in already or are still holding an invitation. The table is where you check, at a glance, who has which role, which accounts they can reach, and how they authenticate.

Required role to configure: Admin or higher.

Users with lower roles can see the list but cannot invite, edit, or remove anyone.

The Users tab under Settings → Access control
The Users tab lists roles, access, teams, sign-in method, and invitation status.
What the Columns Mean

Column
What it shows

Role

The user's role. Hover the column header for a reminder of what each role can do.

Asset groups

Asset groups granted directly to this user.

Accounts

Individual accounts granted directly to this user, on top of anything their teams give them.

Teams

The teams they belong to. Each team adds its own asset groups.

Status

Active (has signed in), Pending (invited, not signed in yet), or Expired (the invitation timed out).

Auth method

How they sign in — password, Google, Okta, or Microsoft Entra ID.

Last login

When they last signed in.

Joined

When they were added to the workspace.

Invited by

Who sent the invitation. System means the user was provisioned automatically from your identity provider.

Most users get their data access through Teams rather than through the Asset groups column — a team carries the asset groups, and everyone in it inherits them. See Teams.


How to Invite Users

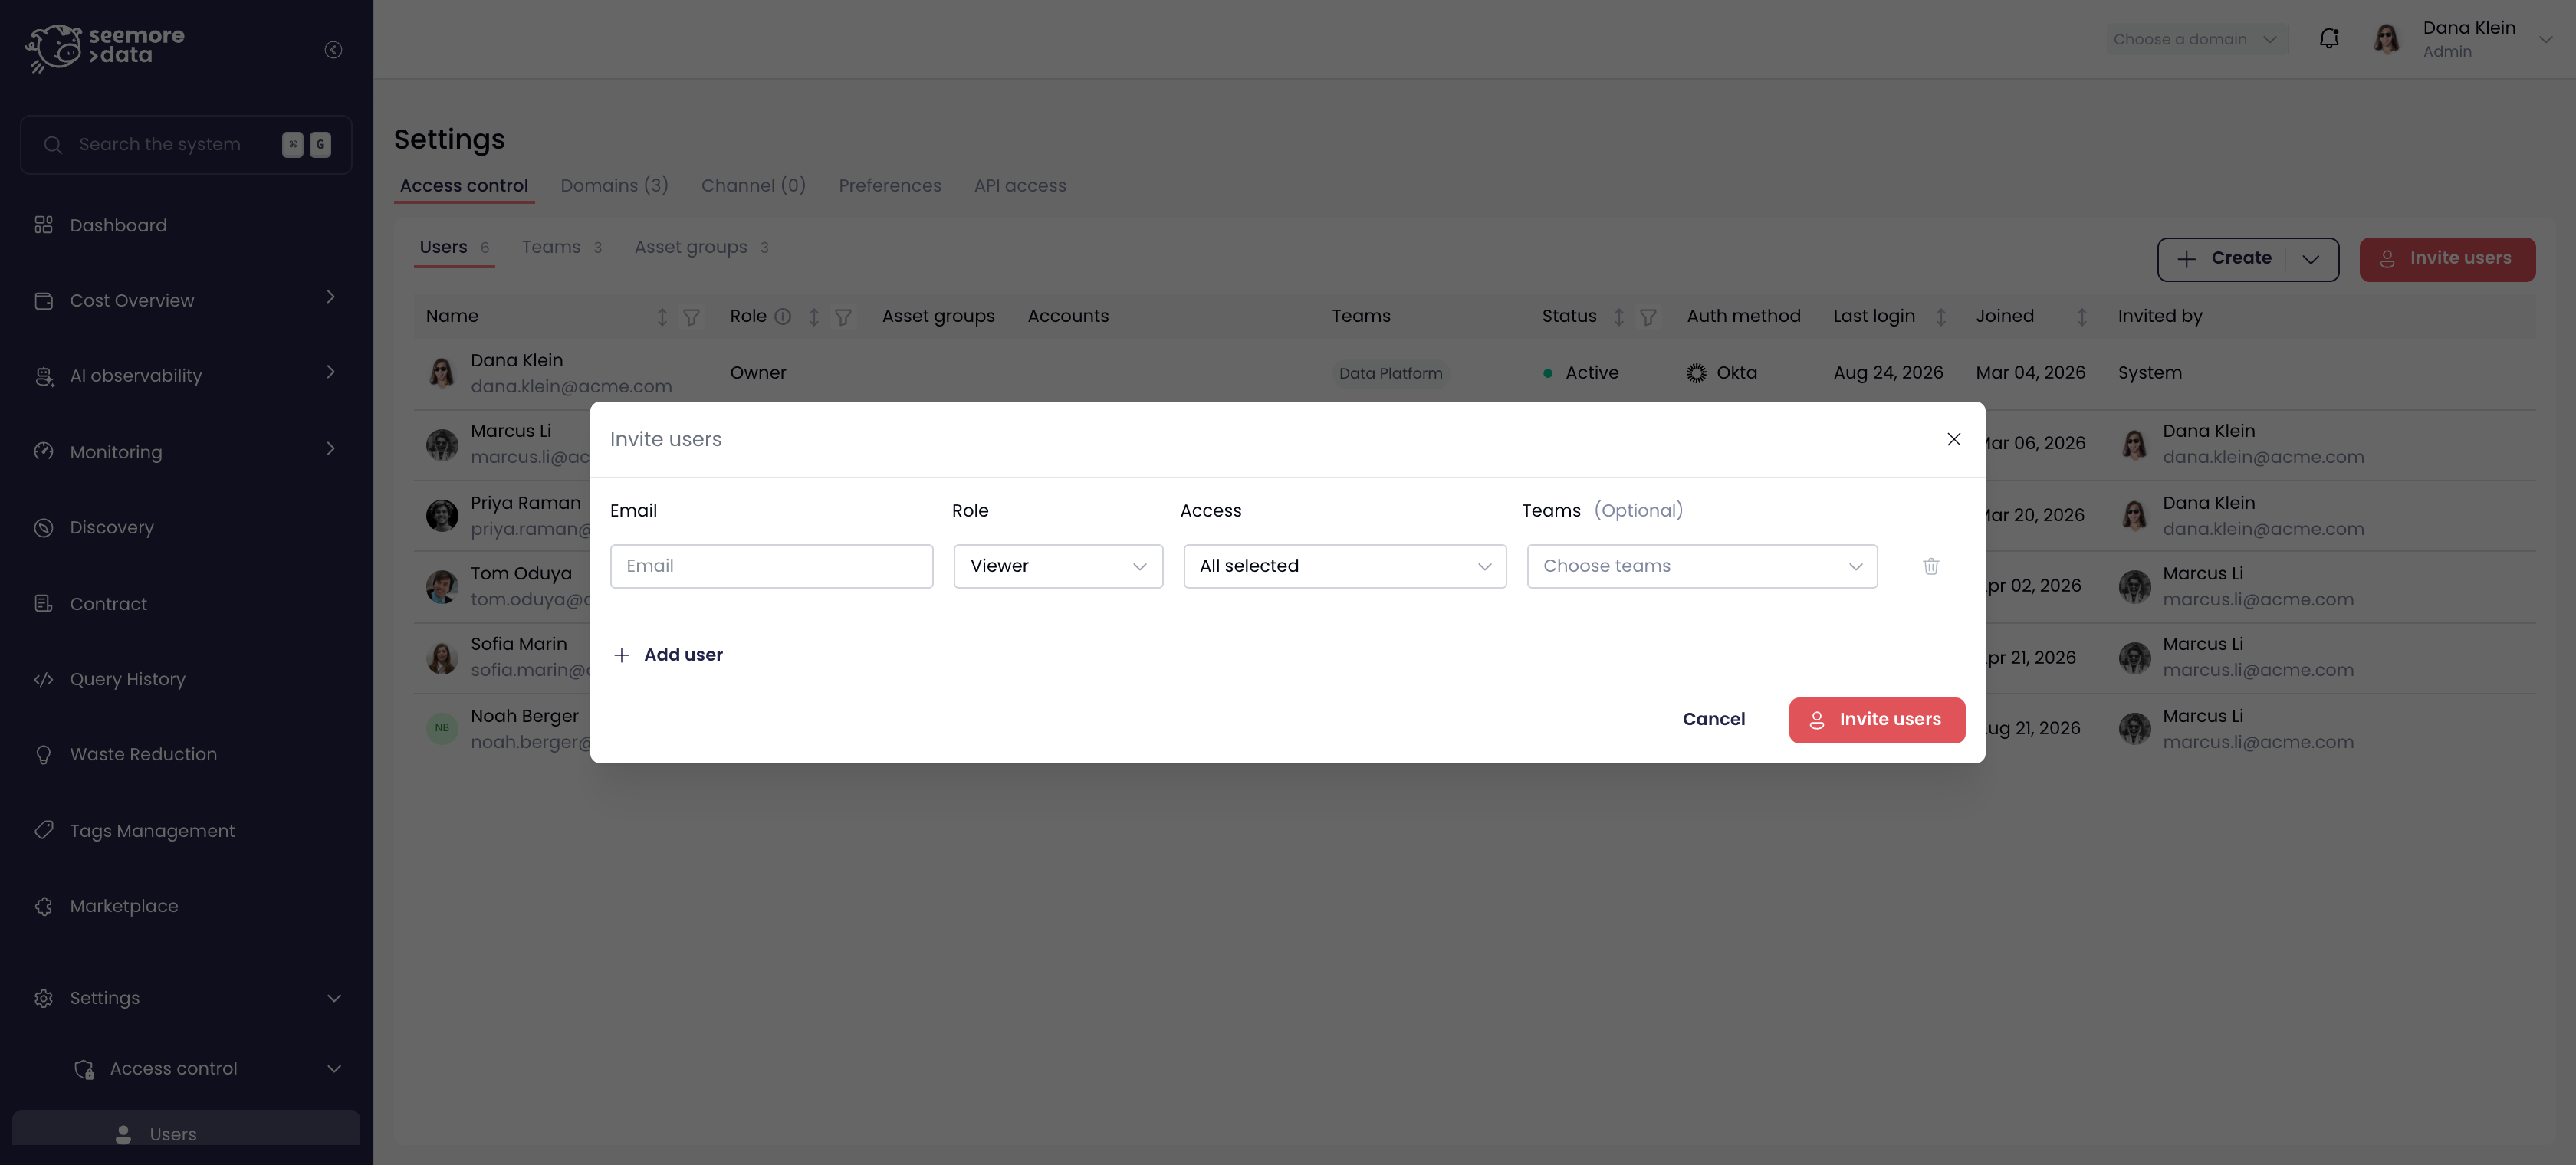
  1. Go to Settings → Access control → Users and click Invite users.

  2. For each person, fill in:

    • Email — the address the invitation is sent to.

    • Role — start with the lowest role that lets them do their job; Viewer is the safe default.

    • Access — the accounts this person may see. Leave it untouched to grant nothing directly and let their teams decide.

    • Teams (optional) — the teams to add them to, which is usually how data access is granted.

  3. Click Add user to invite several people in one go — up to ten per batch.

  4. Click Invite users.

The Invite users dialog
Invite up to ten people at a time, each with their own role, access, and teams.
Invited users appear in the list right away with the status Pending. Until they accept, hovering their row offers Resend invitation, Copy invitation link — so you can share it yourself — and Delete user, which cancels the invitation.


How to Change a User's Role or Access

The quickest way to change only a role is inline: hover the user's Role cell, pick the new role, and confirm with the check mark.

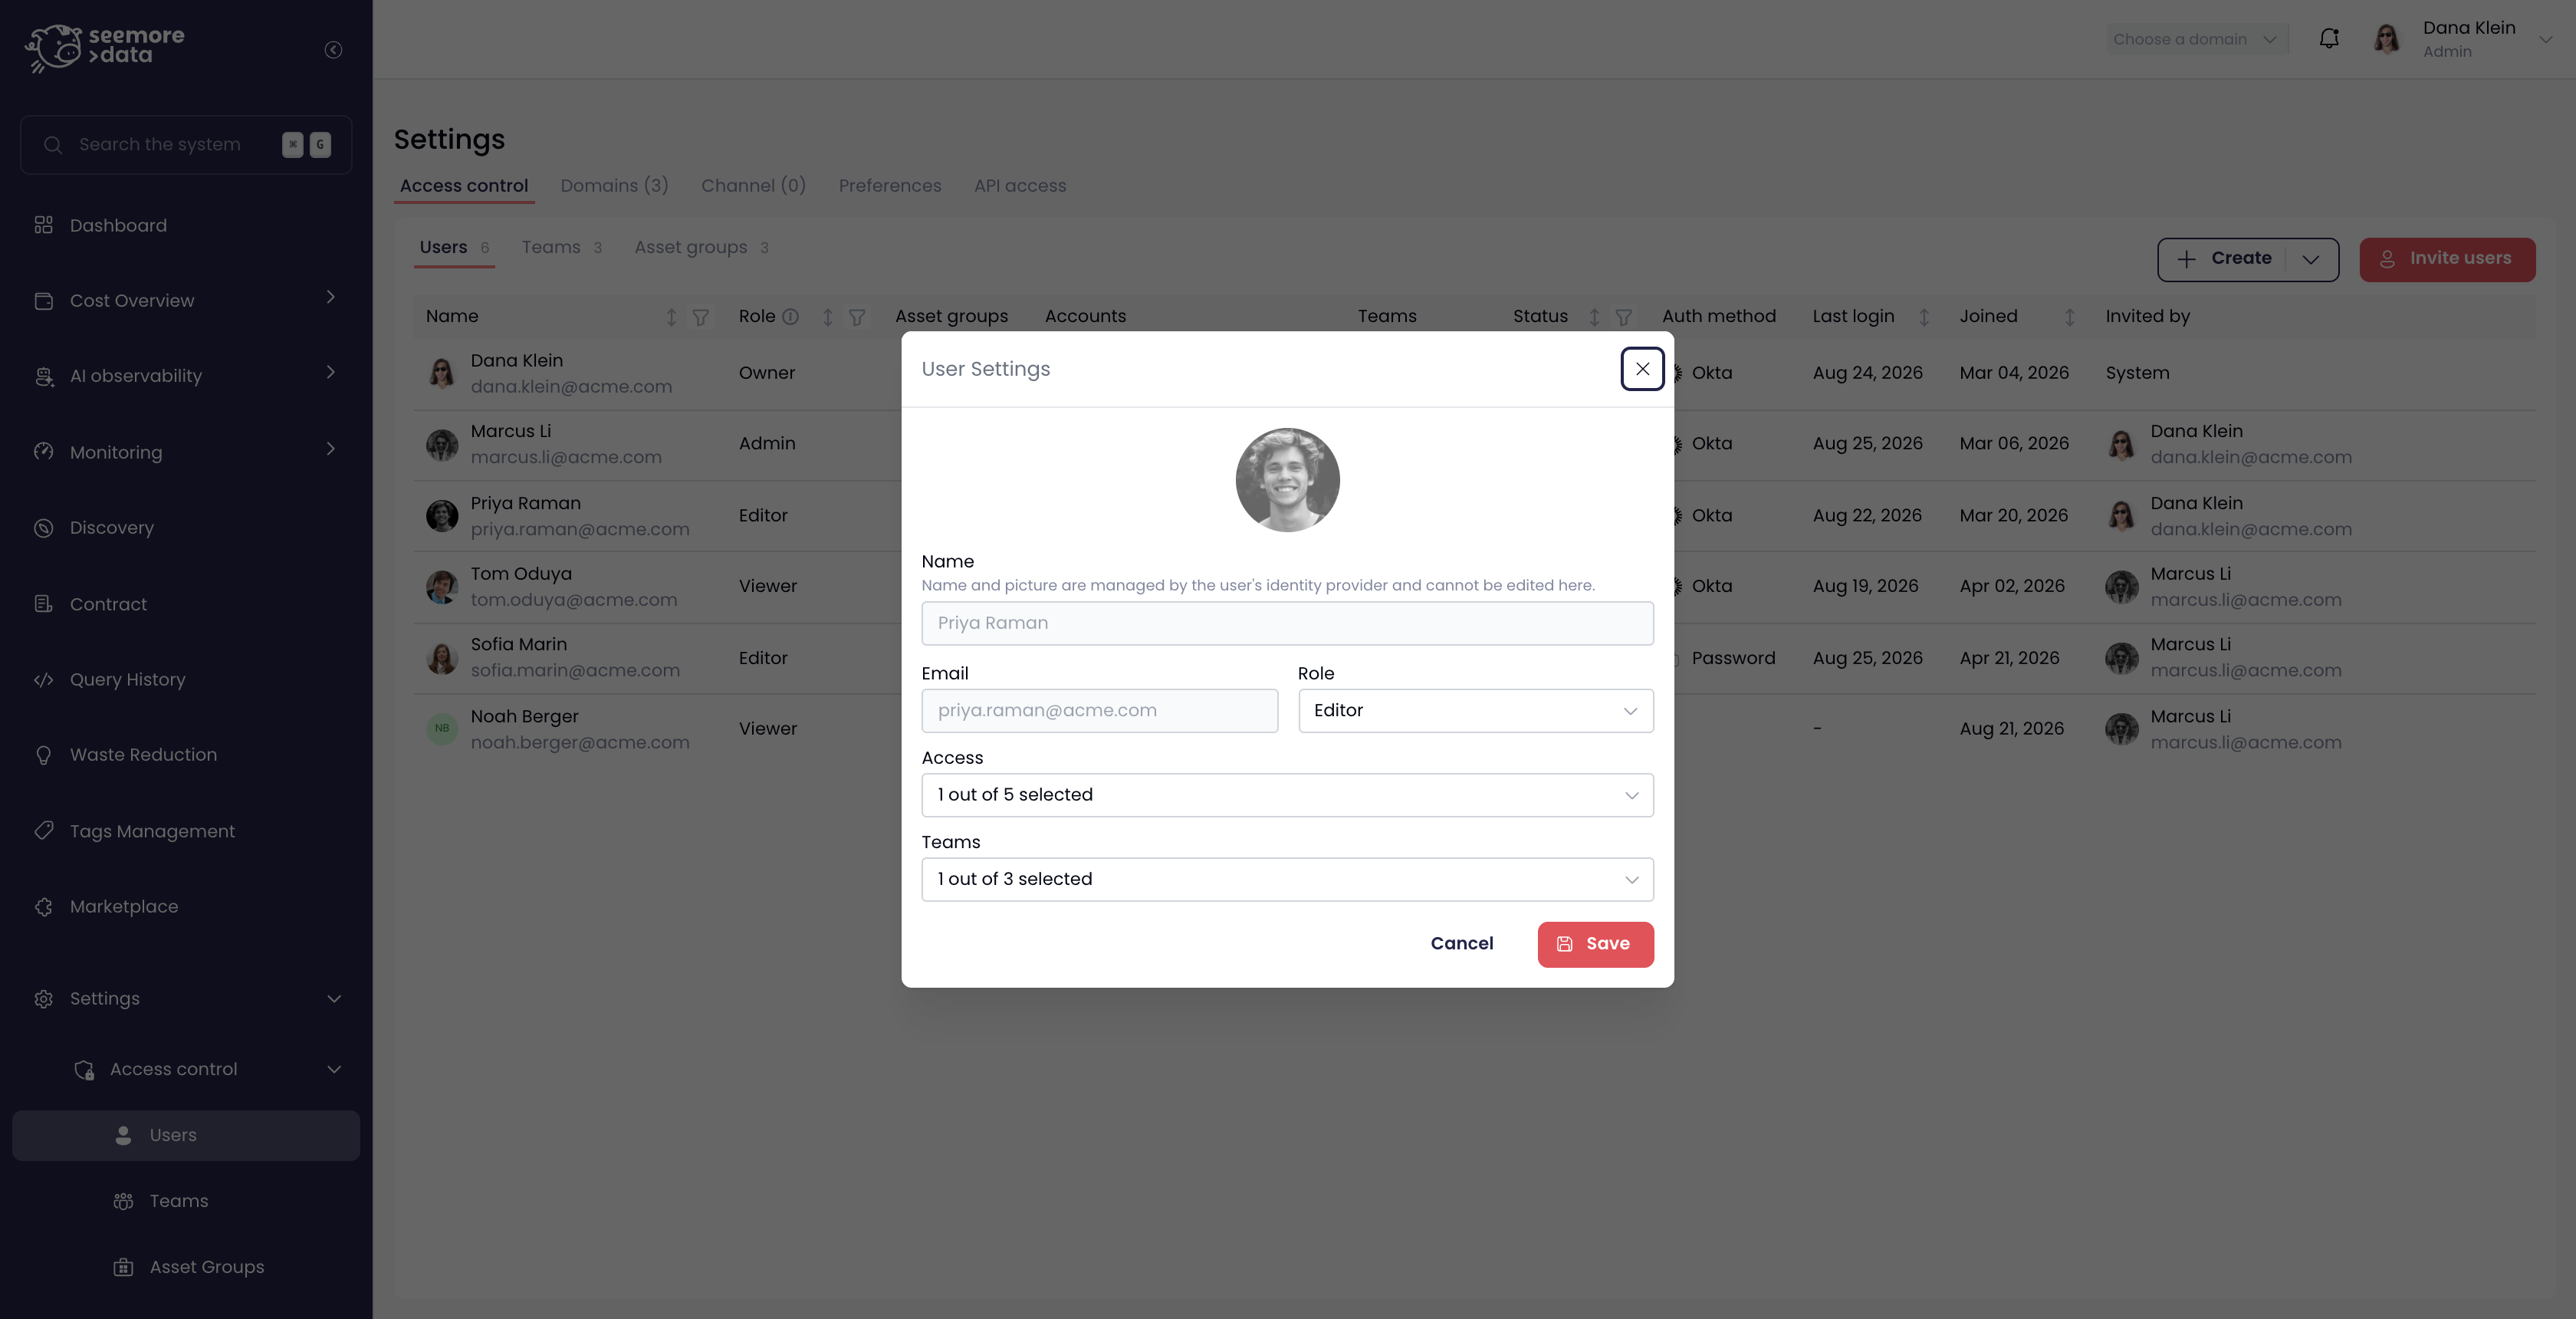
To change everything else, hover the user's row and click Edit on the right:

  • Role — the user's role.

  • Access — the accounts granted directly to this user.

  • Teams — the teams they belong to, and with them the asset groups those teams grant.

The User Settings dialog
Role, direct account access, and team membership for a single user.

When a user signs in through SSO, their name and profile picture come from your identity provider and cannot be edited in Seemore.


How to Remove a User

Hover the user's row, click Delete user on the right, then confirm. The person immediately loses access to the workspace; everything they created — teams, budgets, asset groups — stays in place.

To take away only part of someone's access, remove them from a team or clear their Access list instead of deleting the account.


Notes & Best Practices

  • Default new users to Viewer and promote them once you know what they need.

  • Grant access through teams, not per user. One change to a team updates everyone in it.

  • Keep the Owner count small — Owners see every account and can manage asset groups.

  • Watch the Status column. Long-standing Pending or Expired rows are usually invitations worth resending or cleaning up.

  • If you provision users from Okta, manage roles and teams there instead — see Identity Provider Sync.

Last updated